This is the last post of the series “Half Dozen Hello Worlds” where we explored different ways of communicating with Android users.
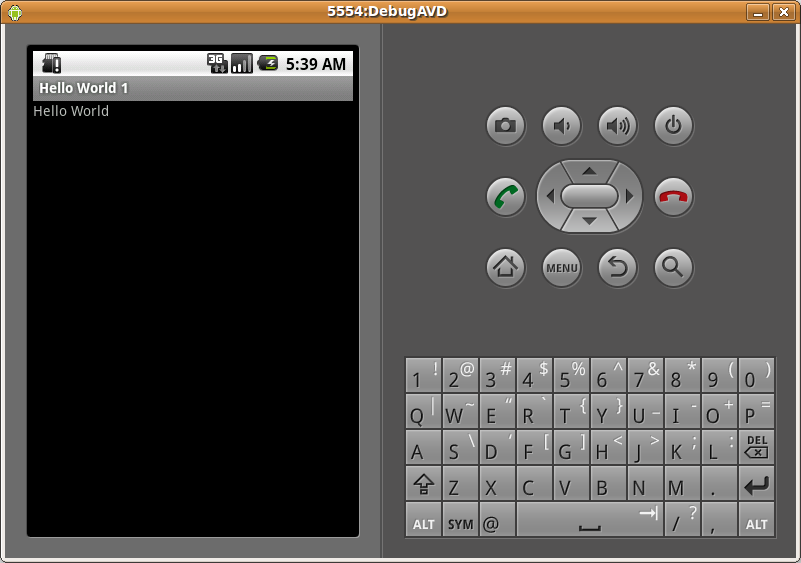
Part 1 used a simple TextView widget to display “Hello World” on the screen.
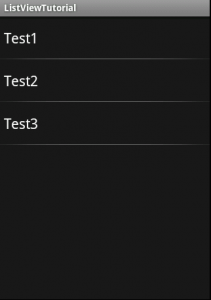
Part 2 explored using a Layout XML.
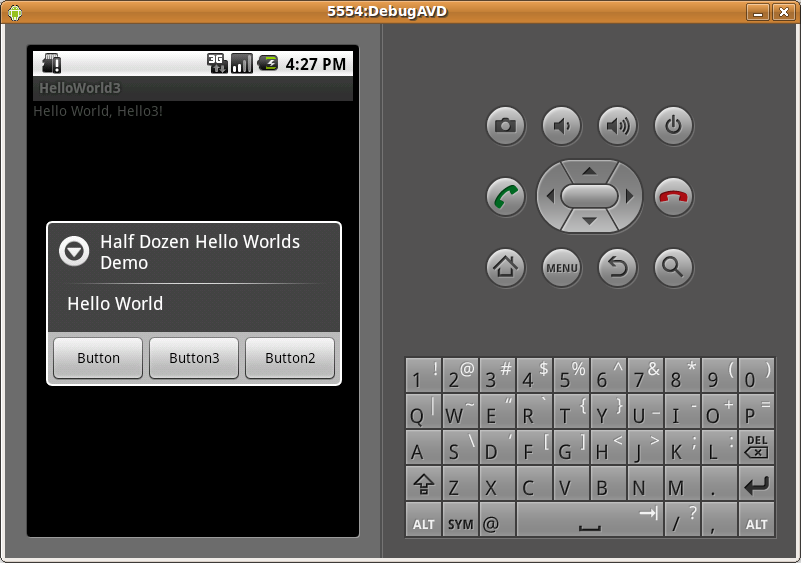
Part 3 showed you two different kinds of pop-up message.
Part 4 explored using Text to Speech to have Android actually say “Hello World” out loud.
When I was in college one of my favorite professors was Dr. Heath. He taught Calculus and he would often spend ten or fifteen minutes in front of the board showing the steps to work out a single problem. When he finished and the answer was 3 (or whatever) he would face the class with a big grin on his face and say, “That’s how you get 3, THE HARD WAY!” Today we are going to display “Hello World” THE HARD WAY.
OpenGL is a very powerful Graphics Library (which is what GL stands for incidentally) which is intended to be hardware independent. The version of OpenGL that is implemented on Android is called OpenGL ES 1.0 (The ES stands for Embedded Systems). If you are unfamiliar with OpenGL all you really need to know right now is that it is a library for rendering 3D graphics. We will be rendering our Hello World as a series of Line Segments in 3D space. Rendering, in case you don’t know, simply refers to displaying three dimensional objects on a two dimensional surface (i.e. your screen).
This is a more advanced topic and will, by necessity, be more involved than previous examples. I will try my best to explain each part in detail, but please leave a comment if you have any questions as there is a lot to cover. We are only going to scratch the surface of OpenGL on Android here, but it should be enough to get you started.
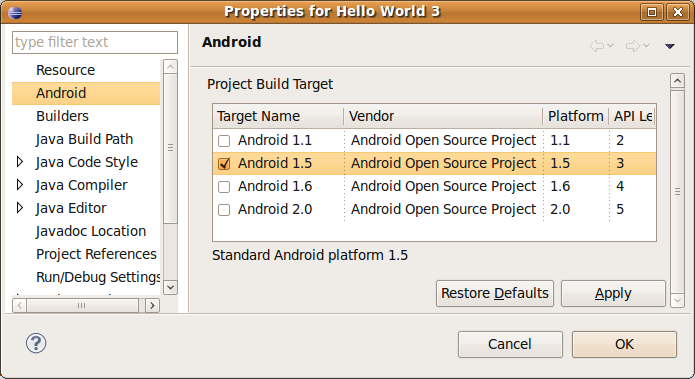
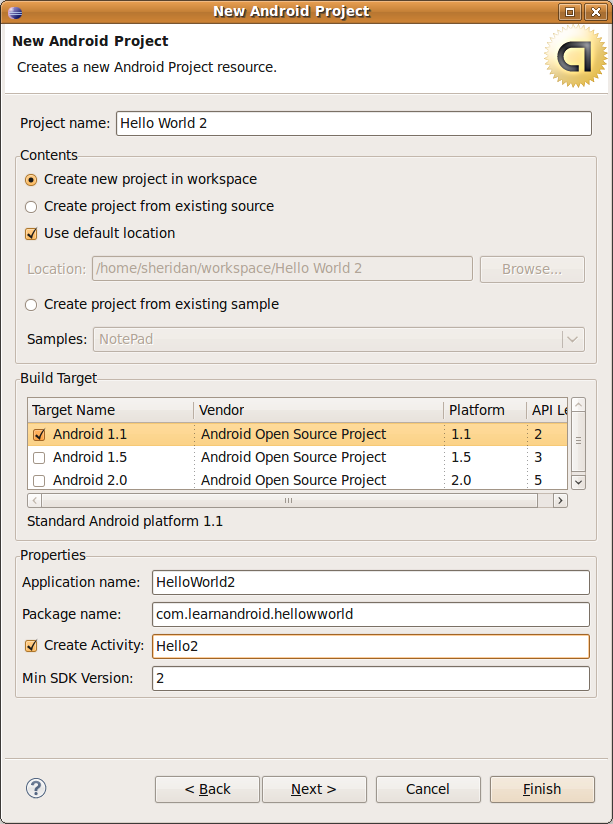
First we are going to create a new Android Project using Android 1.5 (Minimum SDK 3). I will assume you know how to do this since it was covered in Part 1. I named my main Activity Hello5. Here is the source code from that activity.
The first thing you will probably notice here is the new import statement at the top.
GLSurfaceView is a new kind of view that will provide us with a drawing surface on which to render our 3D objects. GLSurfaceView was introduced in Android 1.5 and is the reason we selected 1.5 for our minimum SDK for this project. GLSurfaceView will take care of providing us a place to display our graphics with very little effort on our part.
Inside on create we’ve added the following lines to the default code.
The first line initialized the GLSurfaceView with a Context (our Activity). The second line tells our GLSurfaceView the name of the class that will perform the rendering. When you enter this code you will get an error and Eclipse will underline HelloRenderer in red. Hover over it, and select Create class ‘HelloRenderer’.
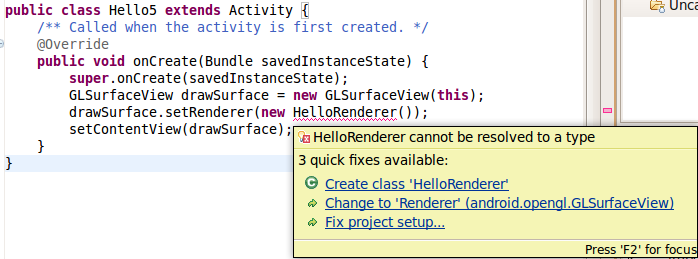 On the create screen that comes up you can leave all of the defaults and just click finish. On the next page we will look at HelloRenderer.java in detail.
HelloRender.java should look like this by default.
The Renderer Interface provides three methods: onDrawFrame, onSurfaceChanged, and onSurfaceCreated. One thing to note is the Renderer in Android will continually draw frames. It will call onDrawFrame repeatedly, allowing you to perform any animations through the logic in this method. In our example program we will be drawing the same thing over and over again, so it will look like a static image, but it is important to realize that frames are constantly being drawn.
onSurfaceCreated provides a place to do any initialization that doesn’t depend on the screen size or orientation. We won’t be using this method in our example.
onSurfaceChanged is called every time there is a new orientation or screen size (including the first time). We are going to put the following code in this method.
glViewPort describes the actual flat representation of the 3D objects. If we were using a camera we would call this the photograph. The first two parameters are the x and y position of the bottom left of the viewport. The last two parameters are the width and height of the viewport. We could have a viewport displayed in a window, which would have values other than (0,0) for the position of its bottom left corner and window height and window width instead of screen height and screen width. In our case, however, we are just going to use the screen values.
glMatrixMode tells OpenGL whether your commands are affecting the projection or the models. Using the camera analogy, we need to be able to specify if we are moving the camera or an object in front of the camera.
will allow us to issue commands to our camera.
OpenGL provides ways to reuse transformations. Our next command:
simply resets the projection matrix so we know that no previous commands sent to OpenGL will be compounded with our commands.
Finally, we get to the actual command we are trying to issue to our projection matrix (camera).
The values that are passed to gluPerspective are our GL10 object, the angle of view, the aspect ratio, and the distance to the near and far planes. I’ve provided links to information about angle of view and aspect ratio. The near plane how close an object can be (beyond the near plane) before it is included in the picture. The far plane is the greatest distance an object can be from the camera before it is no longer included. You can think of this is setting your range of vision. The values I picked here are largely arbitrary for everything except aspect ratio. Feel free to play around with these numbers and note the affect on the rendered image.
Finally we call these lines of code to put us back into ModelView (so our commands will affect the objects instead of the camera) and reset the Model matrix.
You will frequently see this pattern in OpenGL where you setup your camera and then leave it fixed while manipulating the objects.
Before we look at our code for onDrawFrame I want to introduce an Enum to handle the different letters we will be drawing. Right click on your Project, go to New, then select Enum. Name the Enum Letters and make sure the package matches the package of your Activity; com.learnandroid.helloworld in my case. Now replace the code in Letters.java with the following code.
A full discussion on enums in Java is beyond the scope of this tutorial, but I will mention that enums in Java can have most of the features classes have. They can have methods, such as the draw method in our Letters enum. They can have constructors, but only private constructors that get called automatically. The enum class here allows us a simple way to define the points for each letter.
In the constructor I simply take an array of points (or vertices) and put them into a buffer than can be used by OpenGL. Each letter is defined by the set of verticies it passes to the constructor. That is, each pair of numbers represents a point (x, y) in our letter. I have put spaces between each pair of points to make it easier to read, because these define the start and end of a line segment.
Let’s look at how these points are being used in our draw method.
These lines are telling OpenGL to use our vertexBuffer for the Vertex Array, and then telling OpenGL to enable the Vertex Array so we can use it.
This line does the actual drawing. The first parameter tells it what to draw. GL_LINES will take the first two vertices in the array and draw a line between them, then it will take the next two verticies and draw a line between them, and so on. If there is an odd number of vertices the last vertex will be ignored.
Finally we tell OpenGL that it can disable the Vertex Array when we are done with it.
Now let’s go back to HelloRenderer.java and look at the onDrawFrame method.
Here is the code in my onDrawFrame method.
The first two lines reset the drawing surface.
First clearing the surface to the background color, and then loading the identity matrix so no previous commands will affect our next set of commands.
Next I issue this command:
This tells OpenGL to translate (move without rotating) the position where the next object will be drawn by (-4, 5, -20) along the x axis, y axis, and z axis respectively. This is the only time I will translate along the Z axis, but I need to make sure we are between the near and far planes that we set to 0.1 and 100. After performing my translation I will call the draw method on the letter H from my enum, causing it to draw itself.
Now the next line of code will move the position from where we drew the letter H.
This is why we called gl.glLoadIdentity() at the very beginning of this method. If we had not done so OpenGL would begin where we left off the last time we drew a frame. Now, however, we use this to our advantage since we want to draw our letter E to the right of our letter H. The rest of this method follow this procedure, moving the position and then calling the draw function on the desired letter. I got the numbers used both for the vertices for each letter and for the distance used in the translations through trial and error, so they are based on how I thought the letters should look rather than any system. You should, by all means, try out different numbers to see what results you get. Here is my final result.
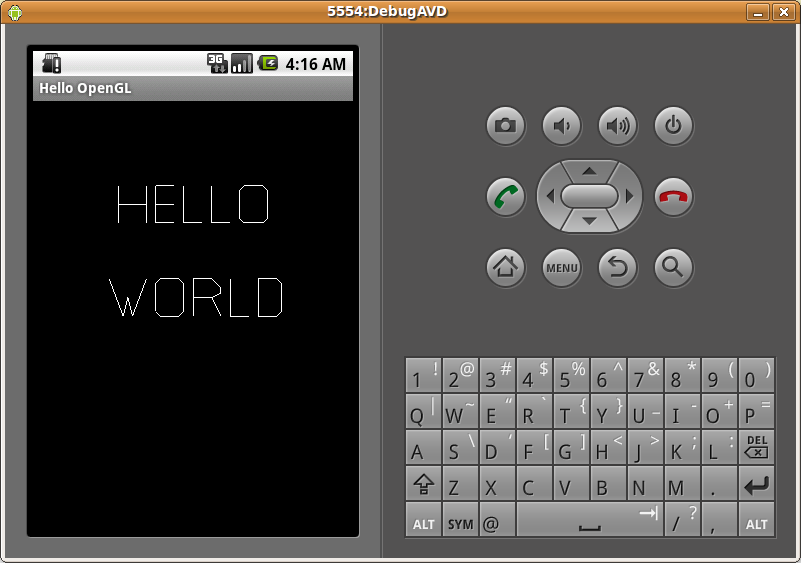
I know there was a lot of new material here, covered very quickly. If you have any specific questions please leave a comment and I will be happy to answer to the best of my ability. Also, since we have reached the end of the Hello World series please let me know if there is any specific topic you would like to see covered in a future article.
Part 1 used a simple TextView widget to display “Hello World” on the screen.
Part 2 explored using a Layout XML.
Part 3 showed you two different kinds of pop-up message.
Part 4 explored using Text to Speech to have Android actually say “Hello World” out loud.
When I was in college one of my favorite professors was Dr. Heath. He taught Calculus and he would often spend ten or fifteen minutes in front of the board showing the steps to work out a single problem. When he finished and the answer was 3 (or whatever) he would face the class with a big grin on his face and say, “That’s how you get 3, THE HARD WAY!” Today we are going to display “Hello World” THE HARD WAY.
OpenGL is a very powerful Graphics Library (which is what GL stands for incidentally) which is intended to be hardware independent. The version of OpenGL that is implemented on Android is called OpenGL ES 1.0 (The ES stands for Embedded Systems). If you are unfamiliar with OpenGL all you really need to know right now is that it is a library for rendering 3D graphics. We will be rendering our Hello World as a series of Line Segments in 3D space. Rendering, in case you don’t know, simply refers to displaying three dimensional objects on a two dimensional surface (i.e. your screen).
This is a more advanced topic and will, by necessity, be more involved than previous examples. I will try my best to explain each part in detail, but please leave a comment if you have any questions as there is a lot to cover. We are only going to scratch the surface of OpenGL on Android here, but it should be enough to get you started.
First we are going to create a new Android Project using Android 1.5 (Minimum SDK 3). I will assume you know how to do this since it was covered in Part 1. I named my main Activity Hello5. Here is the source code from that activity.
package com.learnandroid.helloworld;

import android.app.Activity;
import android.opengl.GLSurfaceView;
import android.os.Bundle;

public class Hello5 extends Activity {
    /** Called when the activity is first created. */
    @Override
    public void onCreate(Bundle savedInstanceState) {
        super.onCreate(savedInstanceState);
        GLSurfaceView drawSurface = new GLSurfaceView(this);
        drawSurface.setRenderer(new HelloRenderer());
        setContentView(drawSurface);
    }
}
import android.opengl.GLSurfaceView;
Inside on create we’ve added the following lines to the default code.
GLSurfaceView drawSurface = new GLSurfaceView(this);
drawSurface.setRenderer(new HelloRenderer());
 On the create screen that comes up you can leave all of the defaults and just click finish. On the next page we will look at HelloRenderer.java in detail.
HelloRender.java should look like this by default.
package com.learnandroid.helloworld;

import javax.microedition.khronos.egl.EGLConfig;
import javax.microedition.khronos.opengles.GL10;

import android.opengl.GLSurfaceView.Renderer;

public class HelloRenderer implements Renderer {

 @Override
 public void onDrawFrame(GL10 arg0) {
  // TODO Auto-generated method stub

 }

 @Override
 public void onSurfaceChanged(GL10 arg0, int arg1, int arg2) {
  // TODO Auto-generated method stub

 }

 @Override
 public void onSurfaceCreated(GL10 arg0, EGLConfig arg1) {
  // TODO Auto-generated method stub

 }

}
onSurfaceCreated provides a place to do any initialization that doesn’t depend on the screen size or orientation. We won’t be using this method in our example.
onSurfaceChanged is called every time there is a new orientation or screen size (including the first time). We are going to put the following code in this method.
@Override
 public void onSurfaceChanged(GL10 gl, int width, int height) {
  gl.glViewport(0, 0, width, height);
  gl.glMatrixMode(GL10.GL_PROJECTION);
  gl.glLoadIdentity();
  GLU.gluPerspective(gl, 60.0f, (float)width / (float)height, 0.1f, 100.0f);
  gl.glMatrixMode(GL10.GL_MODELVIEW);
  gl.glLoadIdentity();
 }
glMatrixMode tells OpenGL whether your commands are affecting the projection or the models. Using the camera analogy, we need to be able to specify if we are moving the camera or an object in front of the camera.
gl.glMatrixMode(GL10.GL_PROJECTION)
OpenGL provides ways to reuse transformations. Our next command:
gl.glLoadIdentity();
Finally, we get to the actual command we are trying to issue to our projection matrix (camera).
GLU.gluPerspective(gl, 60.0f, (float)width / (float)height, 0.1f, 100.0f);
Finally we call these lines of code to put us back into ModelView (so our commands will affect the objects instead of the camera) and reset the Model matrix.
gl.glMatrixMode(GL10.GL_MODELVIEW);
gl.glLoadIdentity();
Before we look at our code for onDrawFrame I want to introduce an Enum to handle the different letters we will be drawing. Right click on your Project, go to New, then select Enum. Name the Enum Letters and make sure the package matches the package of your Activity; com.learnandroid.helloworld in my case. Now replace the code in Letters.java with the following code.
package com.learnandroid.helloworld;

import java.nio.ByteBuffer;
import java.nio.ByteOrder;
import java.nio.FloatBuffer;

import javax.microedition.khronos.opengles.GL10;

public enum Letters {
 D (new float[] {
   0.0f, 2.0f,
   0.0f, 0.0f,

   0.0f, 0.0f,
   1.0f, 0.0f,

   1.0f, 0.0f,
   1.25f, 0.25f,

   1.25f, 0.25f,
   1.25f, 1.75f,

   1.25f, 1.75f,
   1.0f, 2.0f,

   1.0f, 2.0f,
   0.0f, 2.0f
 }),
 E (new float[] {
   0.0f, 2.0f,
   0.0f, 0.0f,

   0.0f, 2.0f,
   1.0f, 2.0f,

   0.0f, 1.0f,
   1.0f, 1.0f,

   0.0f, 0.0f,
   1.0f, 0.0f
 }),
 H (new float[] {
   0.0f, 2.0f,
   0.0f, 0.0f,

   0.0f, 1.0f,
   1.5f, 1.0f,

   1.5f, 2.0f,
   1.5f, 0.0f
 }),
 L (new float[] {
   0.0f, 2.0f,
   0.0f, 0.0f,

   0.0f, 0.0f,
   1.0f, 0.0f
   }),

 O (new float[] {
   0.0f, 1.75f,
   0.0f, 0.25f,

   0.0f, 0.25f,
   0.25f, 0.0f,

   0.25f, 0.0f,
   1.25f, 0.0f,

   1.25f, 0.0f,
   1.5f, 0.25f,

   1.5f, 0.25f,
   1.5f, 1.75f,

   1.5f, 1.75f,
   1.25f, 2.0f,

   1.25f, 2.0f,
   0.25f, 2.0f,

   0.25f, 2.0f,
   0.0f, 1.75f

 }),
 R (new float[] {
   0.0f, 2.0f,
   0.0f, 0.0f,

   0.0f, 2.0f,
   1.0f, 2.0f,

   1.0f, 2.0f,
   1.5f, 1.5f,

   1.5f, 1.5f,
   1.5f, 1.25f,

   1.5f, 1.25f,
   1.0f, 1.0f,

   1.0f, 1.0f,
   0.0f, 1.0f,

   1.0f, 1.0f,
   1.5f, 0.0f

 }),
 W (new float[] {
   0.0f, 2.0f,
   0.75f, 0.0f,

   0.75f, 0.0f,
   1.0f, 1.0f,

   1.0f, 1.0f,
   1.25f, 0.0f,

   1.25f, 0.0f,
   2.0f, 2.0f
 });

 //Constructor - Load Vertices into a Buffer for OpenGL
 private Letters(float[] vertices)
 {
  this.vertices = vertices;

  ByteBuffer buffer = ByteBuffer.allocateDirect(vertices.length * 4);
  buffer.order(ByteOrder.nativeOrder());
  vertexBuffer = buffer.asFloatBuffer();
  vertexBuffer.put(this.vertices);
  vertexBuffer.position(0);
 }

 public void draw(GL10 gl)
 {
  gl.glVertexPointer(2, GL10.GL_FLOAT, 0, vertexBuffer);

  gl.glEnableClientState(GL10.GL_VERTEX_ARRAY);

  gl.glDrawArrays(GL10.GL_LINES, 0, vertices.length / 2);

  gl.glDisableClientState(GL10.GL_VERTEX_ARRAY);
 }

 private float[] vertices;
 private FloatBuffer vertexBuffer;
}
In the constructor I simply take an array of points (or vertices) and put them into a buffer than can be used by OpenGL. Each letter is defined by the set of verticies it passes to the constructor. That is, each pair of numbers represents a point (x, y) in our letter. I have put spaces between each pair of points to make it easier to read, because these define the start and end of a line segment.
Let’s look at how these points are being used in our draw method.
gl.glVertexPointer(2, GL10.GL_FLOAT, 0, vertexBuffer);
gl.glEnableClientState(GL10.GL_VERTEX_ARRAY);
gl.glDrawArrays(GL10.GL_LINES, 0, vertices.length / 2);
Finally we tell OpenGL that it can disable the Vertex Array when we are done with it.
gl.glDisableClientState(GL10.GL_VERTEX_ARRAY);
Here is the code in my onDrawFrame method.
public void onDrawFrame(GL10 gl) {

     //Reset Drawing Surface
     gl.glClear(GL10.GL_COLOR_BUFFER_BIT | GL10.GL_DEPTH_BUFFER_BIT);
     gl.glLoadIdentity();

     gl.glTranslatef(-4.0f, 5.0f, -20.0f);
     Letters.H.draw(gl);

     gl.glTranslatef(2.0f, 0.0f, 0.0f);
     Letters.E.draw(gl);

     gl.glTranslatef(1.5f, 0.0f, 0.0f);
     Letters.L.draw(gl);

     gl.glTranslatef(1.5f, 0.0f, 0.0f);
     Letters.L.draw(gl);

     gl.glTranslatef(1.5f, 0.0f, 0.0f);
     Letters.O.draw(gl);

     gl.glTranslatef(-7.0f, -5.0f, 0.0f);
     Letters.W.draw(gl);

     gl.glTranslatef(2.5f, 0.0f, 0.0f);
     Letters.O.draw(gl);

     gl.glTranslatef(2.0f, 0.0f, 0.0f);
     Letters.R.draw(gl);

     gl.glTranslatef(2.0f, 0.0f, 0.0f);
     Letters.L.draw(gl);

     gl.glTranslatef(1.5f, 0.0f, 0.0f);
     Letters.D.draw(gl);
 }
gl.glClear(GL10.GL_COLOR_BUFFER_BIT | GL10.GL_DEPTH_BUFFER_BIT);
gl.glLoadIdentity();
Next I issue this command:
gl.glTranslatef(-4.0f, 5.0f, -20.0f);
Letters.H.draw(gl);
gl.glTranslatef(2.0f, 0.0f, 0.0f);

I know there was a lot of new material here, covered very quickly. If you have any specific questions please leave a comment and I will be happy to answer to the best of my ability. Also, since we have reached the end of the Hello World series please let me know if there is any specific topic you would like to see covered in a future article.
 The default Hello2.java will look very similar to the default Hello.java from
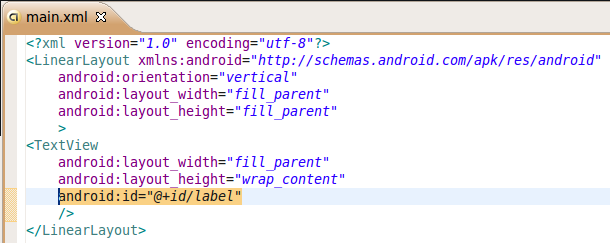
 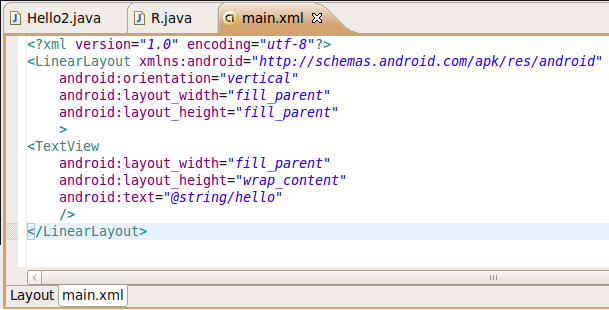 We aren’t going to go into too much detail in this post on the UI XML. I will highlight, however, that the main node is LinearLayout which is a Layout Container that simply lines its children up in order one after another. android:orientation indicates whether they are lined up vertically or horizontally. The one child node we have in LinearLayout in a TextView. This is the same control we used in
 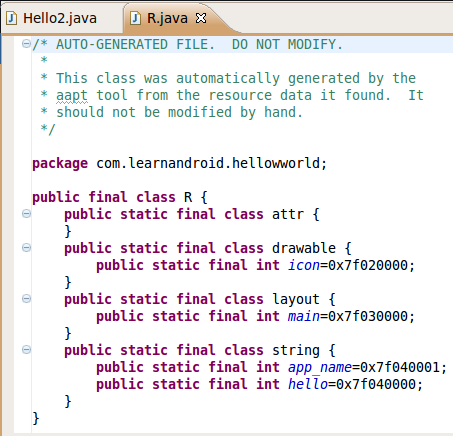 When R.Java is generated it creates a class for each resource type (drawable, layout, and string) and variables in each class providing access to your resources. so R.layout.main actually maps to your main.xml file via this R Class and the layout inner class. If you don’t exactly understand what is going on here don’t worry. Just remember that R will let you access items in your res folder so the line.
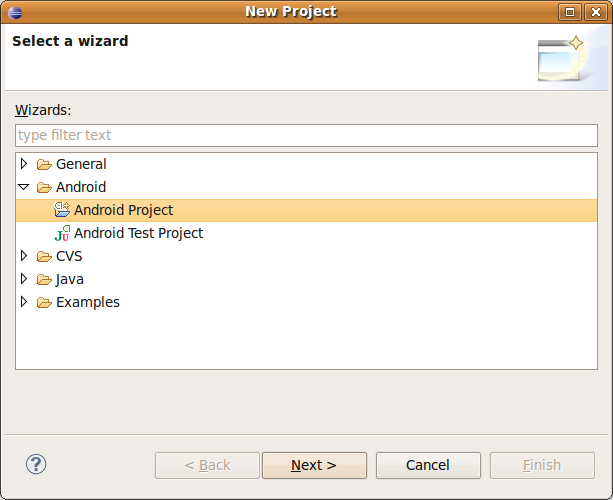
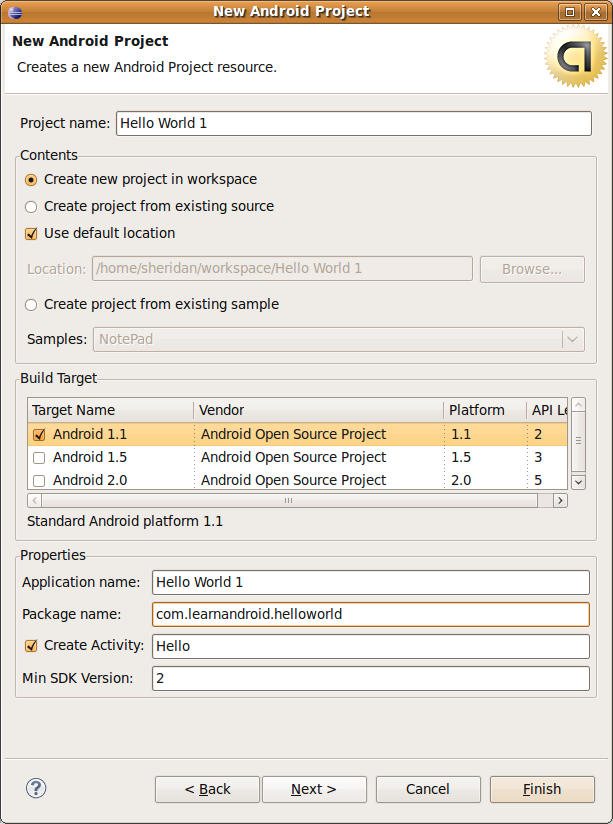
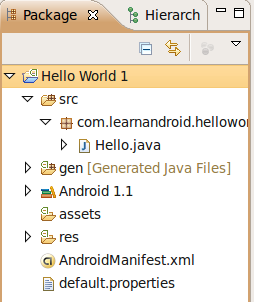 If you expand the project, then expand the src folder, and then the package you will see a Java file. This file will be named whatever you called your Activity (so mine is Hello.java). For simplicity I am going to assume you used the same settings I did when creating your project. If you did not just substitute your Activity name for mine. Double click on Hello.java and look at the code that Eclipse has already provided you.