LinearLayout
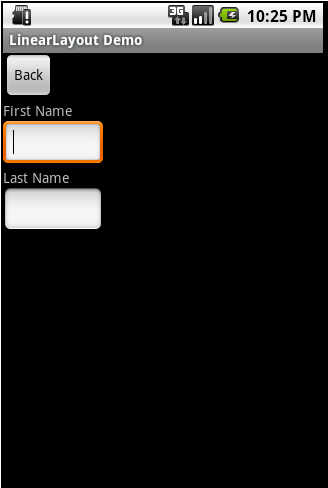
LinearLayout organizes elements along a single line. You specify whether that line is verticle or horizontal using android:orientation. Here is a sample Layout XML using LinearLayout.<LinearLayout xmlns:android="http://schemas.android.com/apk/res/android" android:orientation="horizontal" android:layout_width="fill_parent" android:layout_height="fill_parent"> <Button android:id="@+id/backbutton" android:text="Back" android:layout_width="wrap_content" android:layout_height="wrap_content" /> <TextView android:text="First Name" android:layout_width="wrap_content" android:layout_height="wrap_content" /> <EditText android:width="100px" android:layout_width="wrap_content" android:layout_height="wrap_content" /> <TextView android:text="Last Name" android:layout_width="wrap_content" android:layout_height="wrap_content" /> <EditText android:width="100px" android:layout_width="wrap_content" android:layout_height="wrap_content" /> </LinearLayout>

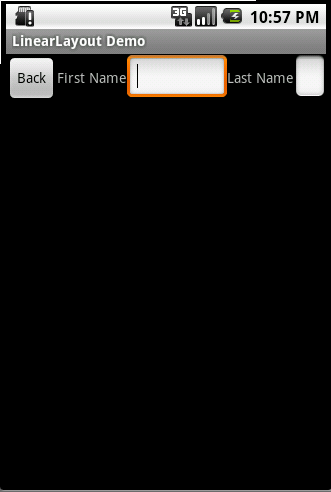
Here is a screenshot of the same XML except that the android:orientation has been changed to horizontal.

You might note that the EditText field at the end of the line has had its width reduced in order to fit. Android will try to make adjustments when necessary to fit items on screen. The last page of this tutorial will cover one method to help deal with this.
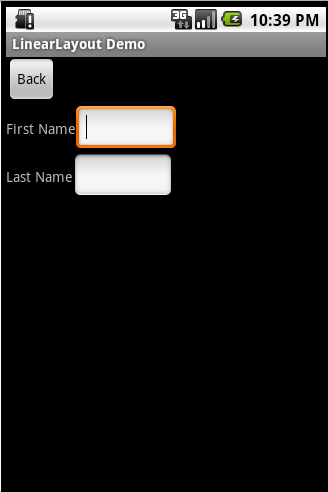
I mentioned on the first page that Layouts can be nested. LinearLayout is frequently nested, with horizontal and vertical layouts mixed. Here is an example of this.
<LinearLayout xmlns:android="http://schemas.android.com/apk/res/android"
 android:orientation="vertical"
 android:layout_width="fill_parent"
    android:layout_height="fill_parent">
     <Button
     android:id="@+id/backbutton"
     android:text="Back"
     android:layout_width="wrap_content"
     android:layout_height="wrap_content" />
    <LinearLayout
     android:orientation="horizontal"
     android:layout_width="fill_parent"
     android:layout_height="wrap_content">
     <TextView
      android:text="First Name"
      android:layout_width="wrap_content"
      android:layout_height="wrap_content" />
     <EditText
      android:width="100px"
      android:layout_width="wrap_content"
      android:layout_height="wrap_content" />
    </LinearLayout>
    <LinearLayout
     android:orientation="horizontal"
     android:layout_width="fill_parent"
     android:layout_height="wrap_content">
     <TextView
      android:text="Last Name"
      android:layout_width="wrap_content"
      android:layout_height="wrap_content" />
     <EditText
      android:width="100px"
      android:layout_width="wrap_content"
      android:layout_height="wrap_content" />
    </LinearLayout>
</LinearLayout>

Nested Layouts do not have to be of one type. I could, for example, have a LinearLayout as one of the children in a FrameLayout.


No comments:
Post a Comment