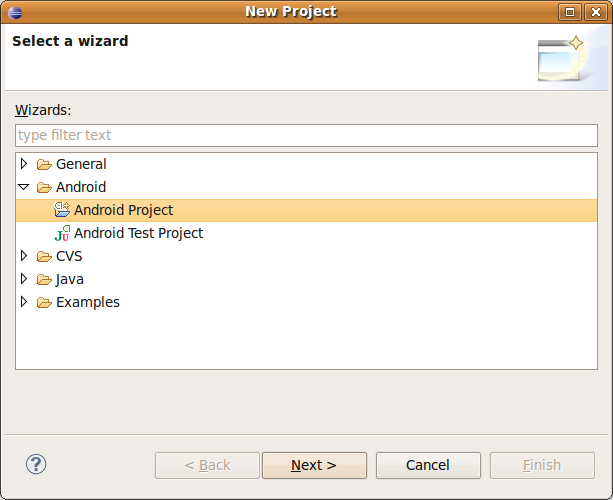
Hello World is a traditional first program because it shows the very simple task of letting the user know you are there (or letting them know that you know that they are there). It’s simple I/O to send a simple message. I am going to give a very brief tour of some of the ways you can communicate with a user in Android in this post. Half Dozen Hello Worlds will highlight some simple I/O and get you started writing your first Android programs. First let’s go ahead and open Eclipse, where you have already setup Android, and create a new Android Project. Go to File -> New -> Project. Select Android Project and click next.

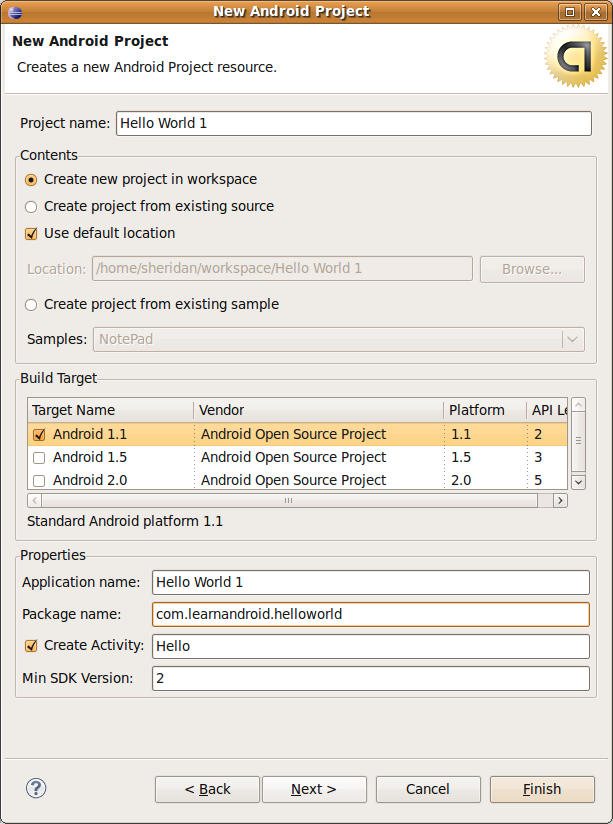
Fill out the information on the next screen for your project.

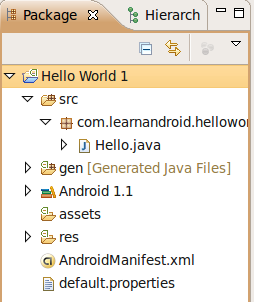
You can put whatever you like for the project name, and application name. Note that I selected Android SDK 1.1. It is a good idea to select the oldest SDK which has all of the features your program needs, to increase compatibility across devices. You can think of Create Activity as being similar to create Main Method. The name of the Activity you place here is the class that will be called when Android tries to run your code. Once you click Finish you should see the Project. If you expand the project, then expand the src folder, and then the package you will see a Java file. This file will be named whatever you called your Activity (so mine is Hello.java). For simplicity I am going to assume you used the same settings I did when creating your project. If you did not just substitute your Activity name for mine. Double click on Hello.java and look at the code that Eclipse has already provided you.
Just to give a quick overview. The package declaration just places this class in the package we specified when we created the project. The two import statements just import the minimum Android libraries needed for an Activity. Since Eclipse created this as an Activity it is going to inherit from the Activity class, and we are overriding onCreate, which is called when an Activity is created. We call onCreate of the superclass. Finally, we are at the one line of code we really care about right now.
setContentView() tells android what to display to the user. We are going to change this from the default so that our code looks like this:
Let’s briefly look at exactly what we did before moving on. TextView is an android widget that displays text. You can think of it as a label, something the user can read but cannot edit. We instantiated a new TextView. Then we called the setText method to set the text of it to “Hello World”.
Next we used setContentView to tell Android that our TextView was what we wanted to display in the main part of our application.
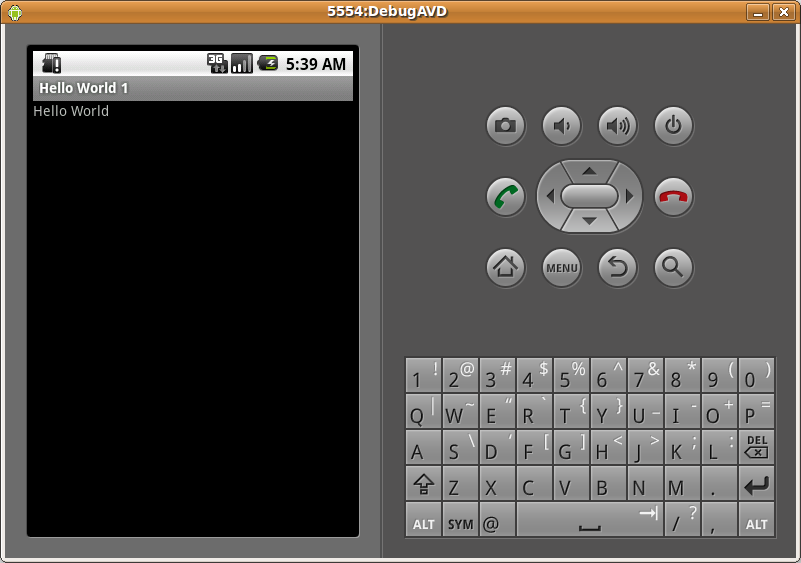
Once your code looks like mine, go to the Run Menu and select Run… In the Run As Popup select Android Application. Your Android Emulator should launch. The Emulator will normally start on a lock screen, but as soon as you unlock the device you should see your application launch.

Congratulations! You have built the first Hello World. This is not the preferred method for creating an android application, however, because the contents of the View (what the user sees) is being generated directly from the code. Android prefers that this be separated out of the code and placed into an XML file. We’ll look at how to do this next in Part 2 of this series.

Fill out the information on the next screen for your project.

You can put whatever you like for the project name, and application name. Note that I selected Android SDK 1.1. It is a good idea to select the oldest SDK which has all of the features your program needs, to increase compatibility across devices. You can think of Create Activity as being similar to create Main Method. The name of the Activity you place here is the class that will be called when Android tries to run your code. Once you click Finish you should see the Project.
 If you expand the project, then expand the src folder, and then the package you will see a Java file. This file will be named whatever you called your Activity (so mine is Hello.java). For simplicity I am going to assume you used the same settings I did when creating your project. If you did not just substitute your Activity name for mine. Double click on Hello.java and look at the code that Eclipse has already provided you.
package com.learnandroid.hellowworld;

import android.app.Activity;
import android.os.Bundle;

public class Hello extends Activity {
    /** Called when the activity is first created. */
    @Override
    public void onCreate(Bundle savedInstanceState) {
        super.onCreate(savedInstanceState);
        setContentView(R.layout.main);
    }
}
setContentView() tells android what to display to the user. We are going to change this from the default so that our code looks like this:
package com.learnandroid.helloworld;

import android.app.Activity;
import android.os.Bundle;
import android.widget.TextView;

public class Hello extends Activity {
    /** Called when the activity is first created. */
    @Override
    public void onCreate(Bundle savedInstanceState) {
        super.onCreate(savedInstanceState);
        TextView helloText = new TextView(this);
        helloText.setText("Hello World");
        setContentView(helloText);
    }
}
Next we used setContentView to tell Android that our TextView was what we wanted to display in the main part of our application.
Once your code looks like mine, go to the Run Menu and select Run… In the Run As Popup select Android Application. Your Android Emulator should launch. The Emulator will normally start on a lock screen, but as soon as you unlock the device you should see your application launch.

Congratulations! You have built the first Hello World. This is not the preferred method for creating an android application, however, because the contents of the View (what the user sees) is being generated directly from the code. Android prefers that this be separated out of the code and placed into an XML file. We’ll look at how to do this next in Part 2 of this series.


No comments:
Post a Comment